GeoNode Advanced Configuration

Overview

The following section will provide some advanced settings and configurations aiming for a production deployment of GeoNode.

Environment Variables

Over the following section, we will highlight some of the most important environment variables available to configure a customized deployment of a GeoNode instance.

GeoNode Project

If you deploy a GeoNode instance via a GeoNode project template, there are a few environment variables you need to take into account because they are affected by your git project (repo) name. Of course, you can override all these by using the default environment variables if you don’t want to follow your GeoNode project naming convention.

COMPOSE_PROJECT_NAME={{project_name}}
DJANGO_SETTINGS_MODULE={{project_name}}.settings
GEONODE_DATABASE={{project_name}}
GEONODE_GEODATABASE={{project_name}}_data
DATABASE_URL=postgis://{{project_name}}:geonode@db:5432/{{project_name}}
GEODATABASE_URL=postgis://{{project_name}}_data:geonode@db:5432/{{project_name}}_data

Database Settings

POSTGRES_USER=postgres
POSTGRES_PASSWORD=postgres
GEONODE_DATABASE=geonode
GEONODE_DATABASE_PASSWORD=geonode
GEONODE_GEODATABASE=geonode_data
GEONODE_GEODATABASE_PASSWORD=geonode_data
GEONODE_DATABASE_SCHEMA=public
GEONODE_GEODATABASE_SCHEMA=public
DATABASE_HOST=db
DATABASE_PORT=5432
DATABASE_URL=postgis://geonode:geonode@db:5432/geonode
GEODATABASE_URL=postgis://geonode_data:geonode_data@db:5432/geonode_data
GEONODE_DB_CONN_MAX_AGE=0
GEONODE_DB_CONN_TOUT=5

GeoServer Settings

GEOSERVER_WEB_UI_LOCATION=http://localhost/geoserver/
GEOSERVER_PUBLIC_LOCATION=http://localhost/geoserver/
GEOSERVER_LOCATION=http://geoserver:8080/geoserver/
GEOSERVER_ADMIN_USER=admin
GEOSERVER_ADMIN_PASSWORD=geoserver

OGC_REQUEST_TIMEOUT=30
OGC_REQUEST_MAX_RETRIES=1
OGC_REQUEST_BACKOFF_FACTOR=0.3
OGC_REQUEST_POOL_MAXSIZE=10
OGC_REQUEST_POOL_CONNECTIONS=10

ENABLE_JSONP=true
outFormat=text/javascript
GEOSERVER_JAVA_OPTS="-Djava.awt.headless=true -Xms2G -Xmx4G -XX:+UnlockDiagnosticVMOptions -XX:+LogVMOutput -XX:LogFile=/var/log/jvm.log -XX:PerfDataSamplingInterval=500 -XX:SoftRefLRUPolicyMSPerMB=36000 -XX:-UseGCOverheadLimit -XX:+UseConcMarkSweepGC -XX:ParallelGCThreads=4 -Dfile.encoding=UTF8 -Djavax.servlet.request.encoding=UTF-8 -Djavax.servlet.response.encoding=UTF-8 -Duser.timezone=GMT -Dorg.geotools.shapefile.datetime=false -DGEOSERVER_CSRF_DISABLED=true -DPRINT_BASE_URL=http://geoserver:8080/geoserver/pdf -DALLOW_ENV_PARAMETRIZATION=true -Xbootclasspath/a:/usr/local/tomcat/webapps/geoserver/WEB-INF/lib/marlin-0.9.3-Unsafe.jar -Dsun.java2d.renderer=org.marlin.pisces.MarlinRenderingEngine"

Django and GeoNode

ADMIN_USERNAME=admin
ADMIN_PASSWORD=admin
ADMIN_EMAIL=admin@localhost

EMAIL_ENABLE=False
DJANGO_EMAIL_BACKEND=django.core.mail.backends.smtp.EmailBackend
DJANGO_EMAIL_HOST=localhost
DJANGO_EMAIL_PORT=25
DJANGO_EMAIL_HOST_USER=
DJANGO_EMAIL_HOST_PASSWORD=
DJANGO_EMAIL_USE_TLS=False
DJANGO_EMAIL_USE_SSL=False
DEFAULT_FROM_EMAIL='GeoNode <no-reply@geonode.org>'

OAUTH2_API_KEY=
OAUTH2_CLIENT_ID=Jrchz2oPY3akmzndmgUTYrs9gczlgoV20YPSvqaV
OAUTH2_CLIENT_SECRET=rCnp5txobUo83EpQEblM8fVj3QT5zb5qRfxNsuPzCqZaiRyIoxM4jdgMiZKFfePBHYXCLd7B8NlkfDBY9HKeIQPcy5Cp08KQNpRHQbjpLItDHv12GvkSeXp6OxaUETv3

Secure your production deployment, change the admin passwords and OAUth2 keys

GeoServer Setup

Admin Password Update

../../_images/geoserver_setup_001.png
../../_images/geoserver_setup_002.png

GeoServer Admin Password Update

OAUth2 REST API Key

Note

To generate new strong random passwords, you can use an online service like https://passwordsgenerator.net/

Avoid using Symbols ( e.g. @#$% ) as they might conflict with .env file

../../_images/geoserver_setup_003.png

OAUth2 REST API Key Update

GeoServer Disk Quota

../../_images/geoserver_setup_004.png

GeoServer Disk Quota Update

Update the passwords and keys on .env file

Note

To generate new strong random passwords, you can use an online service like https://passwordsgenerator.net/

Avoid using Symbols ( e.g. @#$% ) as they might conflict with .env file

--- my_geonode\.env
+++ my_geonode\.prod.env
@@ -6,13 +6,13 @@
# See https://github.com/geosolutions-it/geonode-generic/issues/28
# to see why we force API version to 1.24
DOCKER_API_VERSION="1.24"

C_FORCE_ROOT=1
IS_CELERY=false
-IS_FIRST_START=true
+IS_FIRST_START=false
FORCE_REINIT=false

SITEURL=https://my_geonode.geonode.org/
ALLOWED_HOSTS=['django',]

# LANGUAGE_CODE=pt
@@ -38,13 +38,14 @@
# #################
# geoserver
# #################
GEOSERVER_WEB_UI_LOCATION=https://my_geonode.geonode.org/geoserver/
GEOSERVER_PUBLIC_LOCATION=https://my_geonode.geonode.org/geoserver/
GEOSERVER_LOCATION=http://geoserver:8080/geoserver/
-GEOSERVER_ADMIN_PASSWORD=geoserver
+GEOSERVER_ADMIN_USER=admin
+GEOSERVER_ADMIN_PASSWORD=<new_geoserver_admin_password>

OGC_REQUEST_TIMEOUT=30
OGC_REQUEST_MAX_RETRIES=1
OGC_REQUEST_BACKOFF_FACTOR=0.3
OGC_REQUEST_POOL_MAXSIZE=10
OGC_REQUEST_POOL_CONNECTIONS=10
@@ -84,13 +85,13 @@
RESOLVER=127.0.0.11

# #################
# Security
# #################
# Admin Settings
-ADMIN_PASSWORD=admin
+ADMIN_PASSWORD=<new_geonode_admin_password>
ADMIN_EMAIL=admin@my_geonode.geonode.org

# EMAIL Notifications
EMAIL_ENABLE=False
DJANGO_EMAIL_BACKEND=django.core.mail.backends.smtp.EmailBackend
DJANGO_EMAIL_HOST=localhost
@@ -114,15 +115,15 @@
ACCOUNT_CONFIRM_EMAIL_ON_GET=False
ACCOUNT_EMAIL_VERIFICATION=optional
ACCOUNT_EMAIL_CONFIRMATION_EMAIL=False
ACCOUNT_EMAIL_CONFIRMATION_REQUIRED=False

# OAuth2
-OAUTH2_API_KEY=
-OAUTH2_CLIENT_ID=Jrchz2oPY3akmzndmgUTYrs9gczlgoV20YPSvqaV
-OAUTH2_CLIENT_SECRET=rCnp5txobUo83EpQEblM8fVj3QT5zb5qRfxNsuPzCqZaiRyIoxM4jdgMiZKFfePBHYXCLd7B8NlkfDBY9HKeIQPcy5Cp08KQNpRHQbjpLItDHv12GvkSeXp6OxaUETv3
+OAUTH2_API_KEY=<new_OAUTH2_API_KEY>
+OAUTH2_CLIENT_ID=<new_OAUTH2_CLIENT_ID>
+OAUTH2_CLIENT_SECRET=<new_OAUTH2_CLIENT_SECRET>

# GeoNode APIs
API_LOCKDOWN=False
TASTYPIE_APIKEY=

# #################

Warning

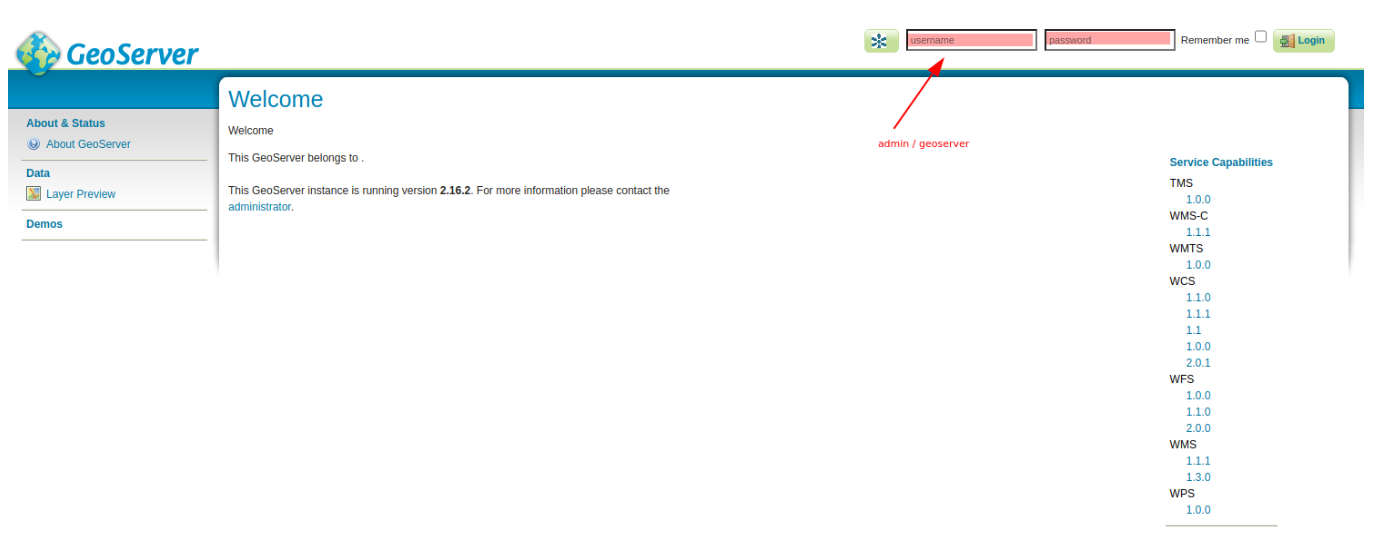
Be careful! The env GEOSERVER_ADMIN_PASSWORD is not actually used to change the GeoServer admin password. You need to log in to the GeoServer UI and change it manually!

[Optional] Update your SSL Certificates

In production deployment mode, GeoNode uses Let’s Encrypt certificates by default

You may want to provide your own certificates to GeoNode

docker exec -it nginx4my_geonode_geonode sh -c 'mkdir /geonode-certificates/my_geonode'

wget --no-check-certificate 'http://<url_to_your_chain.crt>' \
    -O chain.crt

wget --no-check-certificate 'http://<url_to_your_key.key>' \
    -O my_geonode.key

docker cp chain.crt nginx4my_geonode_geonode:/geonode-certificates/my_geonode

docker cp my_geonode.key nginx4my_geonode_geonode:/geonode-certificates/my_geonode

docker-compose exec geonode sh
apk add vim

vim nginx.https.enabled.conf
-ssl_certificate     /certificate_symlink/fullchain.pem;
-ssl_certificate_key /certificate_symlink/privkey.pem;
+ssl_certificate       /geonode-certificates/my_geonode/chain.crt;
+ssl_certificate_key   /geonode-certificates/my_geonode/my_geonode.key;
nginx -s reload
exit

Restart the GeoNode and NGINX containers

Whenever you change something on .env file, you will need to rebuild the container.

Warning

Be careful! The following command drops any change you might have done manually inside the containers, except for the static volumes.

docker-compose up -d django
docker-compose restart geonode

Further Production Enhancements

GeoServer Production Settings

JVM Settings: Memory And GeoServer Options

The .env file provides a way to customize GeoServer JVM Options.

The variable GEOSERVER_JAVA_OPTS allows you to tune up the GeoServer container and to enable specific GeoServer options.

GEOSERVER_JAVA_OPTS=
    -Djava.awt.headless=true -Xms2G -Xmx4G -XX:PerfDataSamplingInterval=500
    -XX:SoftRefLRUPolicyMSPerMB=36000 -XX:-UseGCOverheadLimit -XX:+UseConcMarkSweepGC
    -XX:ParallelGCThreads=4 -Dfile.encoding=UTF8 -Djavax.servlet.request.encoding=UTF-8
    -Djavax.servlet.response.encoding=UTF-8 -Duser.timezone=GMT
    -Dorg.geotools.shapefile.datetime=false -DGEOSERVER_CSRF_DISABLED=true -DPRINT_BASE_URL=http://geoserver:8080/geoserver/pdf

-Djava.awt.headless (true)

Work with graphics-based applications in Java without an actual display, keyboard, or mouse. A typical use case of UI components running in a headless environment could be an image converter app. Though it needs graphics data for image processing, a display is not really necessary. The app could be run on a server and converted files saved or sent over the network to another machine for display.
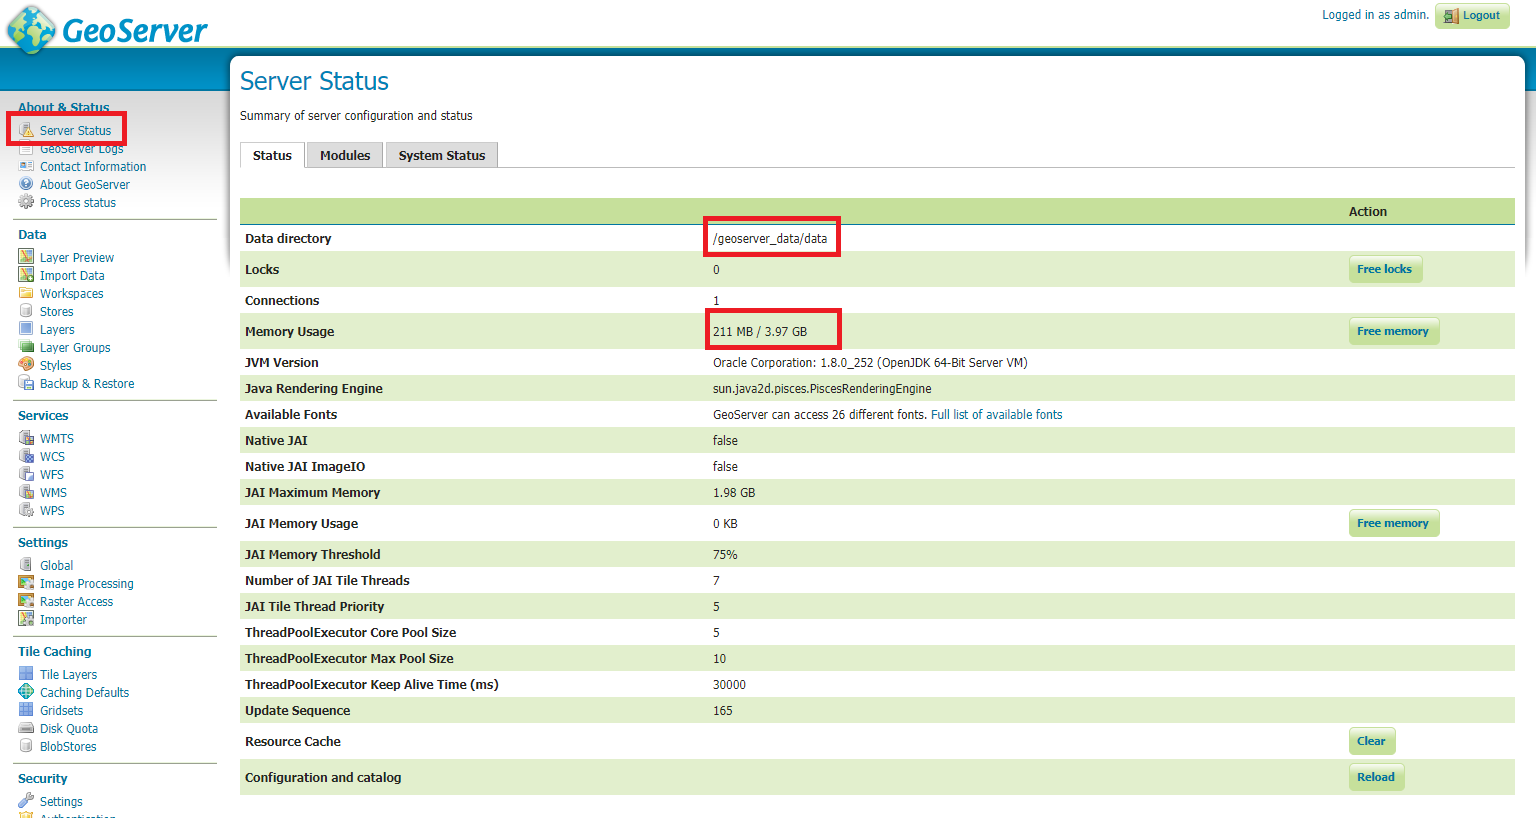
-Xms2G -Xmx4G

This means that your JVM will be started with Xms amount of memory and can use a maximum of Xmx amount of memory. The above will start a JVM with 2 GB of memory and will allow the process to use up to 4 GB of memory. You need to adjust this value depending on your available RAM.
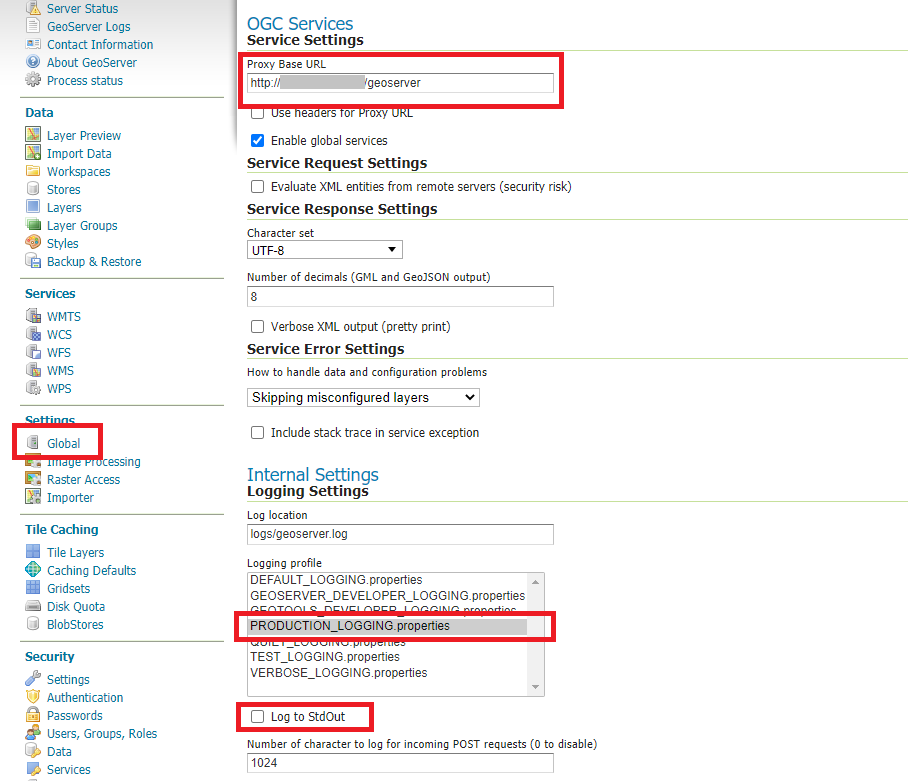
-DGEOSERVER_CSRF_DISABLED (True)

The GeoServer web admin employs a CSRF (Cross-Site Request Forgery) protection filter that will block any form submissions that don’t appear to originate from GeoServer. This can sometimes cause problems for certain proxy configurations. You can disable the CSRF filter by setting the GEOSERVER_CSRF_DISABLED property to true. https://docs.geoserver.org/stable/en/user/security/webadmin/csrf.html

Whenever you need to change one or more of the JVM options, you will need to restart the GeoServer Docker container.

# Hard restart of the container: the only way to update the .env variables
docker-compose up -d geoserver

This command will preserve all the GeoServer configuration and data since the GEOSERVER_DATA_DIR is stored on a Docker static volume.

Nevertheless, any change you have made manually to the container (e.g. added a new plugin to GeoServer or updated some JARs into the WEB-INF/lib library folder) will be lost.

You will need to add the JARs again and restart GeoServer softly

# Soft restart of the container: the .env variables won't be updated
docker-compose restart geoserver

Global And Services Settings

  • Check the GeoServer Memory usage and status. Ensure the GEOSERVER_DATA_DIR path points to the static volume

../../_images/production_geoserver_001.png

GeoServer Status

  • GeoServer Global Settings, make sure the Proxy Base Url points to the public URL and the LOGGING levels are set to Production Mode

../../_images/production_geoserver_002.png

Global Settings

  • GeoServer Image Processing Settings, unless you are using a specific renderer or GeoServer plugin, use the following recommended options

../../_images/production_geoserver_003.png

Image Processing Settings

  • Tune up GeoServer Services Configuration: WCS, WFS, WMS, and WPS;

    • WCS: Update the limits accordingly to your needs. Do not use very high values, this will make GeoServer prone to DoS Attacks.

    ../../_images/production_geoserver_004.png

    WCS Resource Consumption Limits

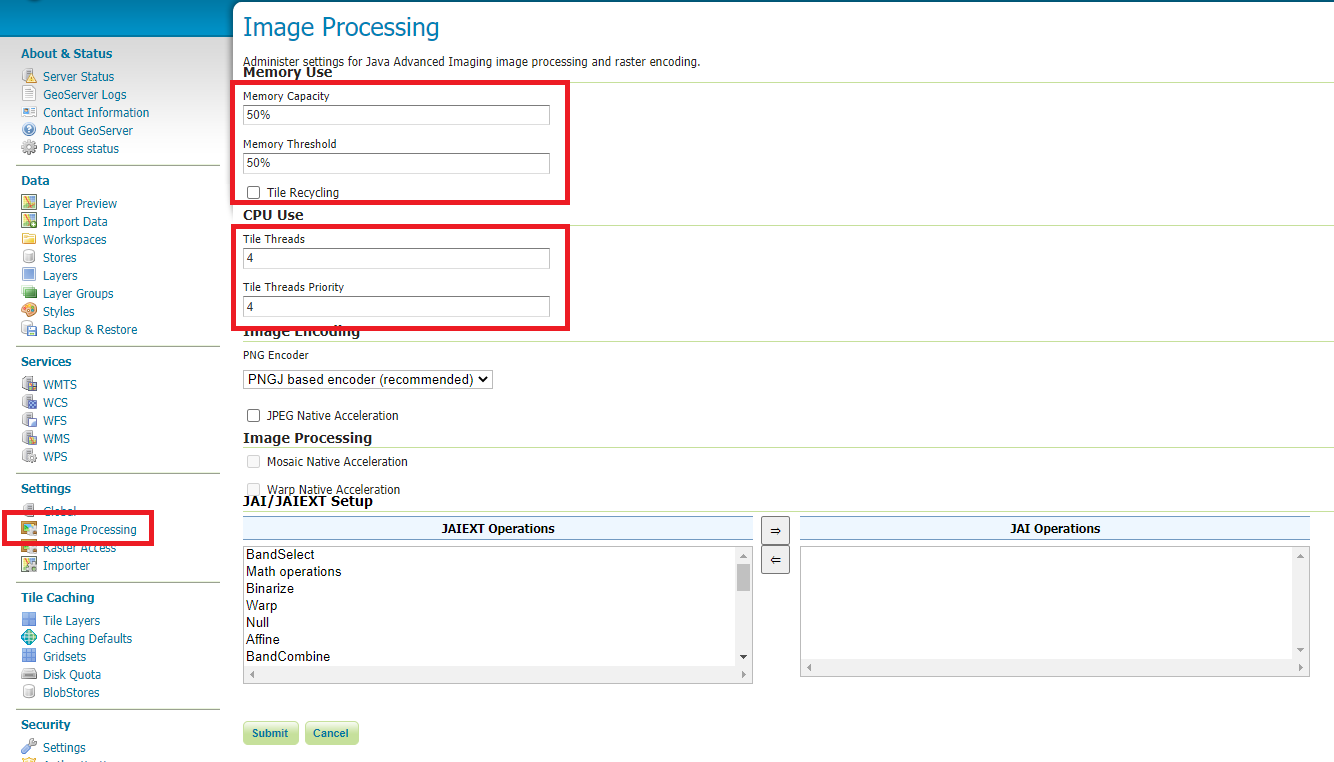
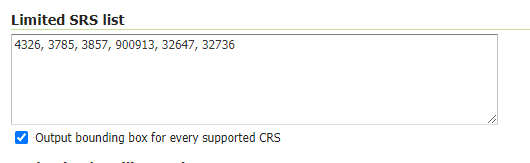
    • WMS: Specify, here the SRS List you are going to use. Empty means all the ones supported by GeoServer, but be careful since the GetCapabilities output will become huge.

    ../../_images/production_geoserver_005.png

    WMS Supported SRS List

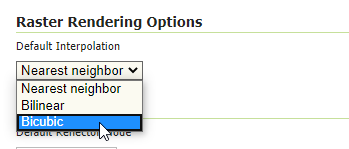
    • WMS: Raster Rendering Options allows you to tune up the WMS output for better performance or quality. Best Performance: Nearest Neighbour - Best Quality: Bicubic

    Warning

    Raster Images should always be optimized before being ingested into GeoNode. The general recommendation is to never upload a non-processed GeoTIFF image to GeoNode.

    Further details at:

    ../../_images/production_geoserver_006.png

    WMS Raster Rendering Options

    • WMS: Update the limits accordingly to your needs. Do not use very high values, this will set GeoServer prone to DoS Attacks.

    ../../_images/production_geoserver_007.png

    WMS Resource Consumption Limits

GeoWebCache DiskQuota On Postgis

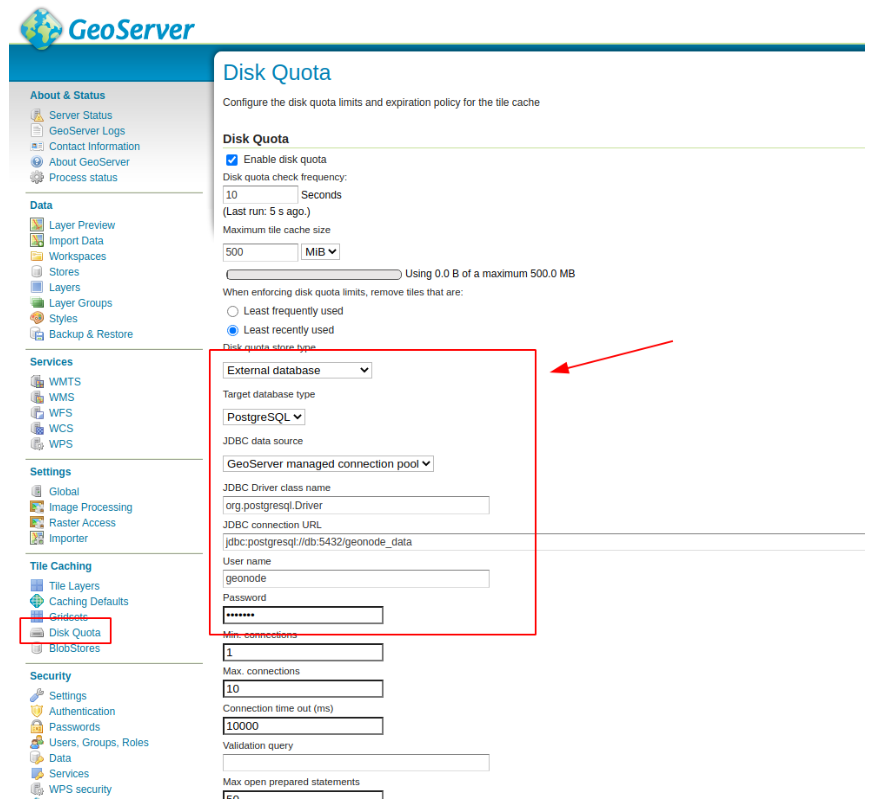
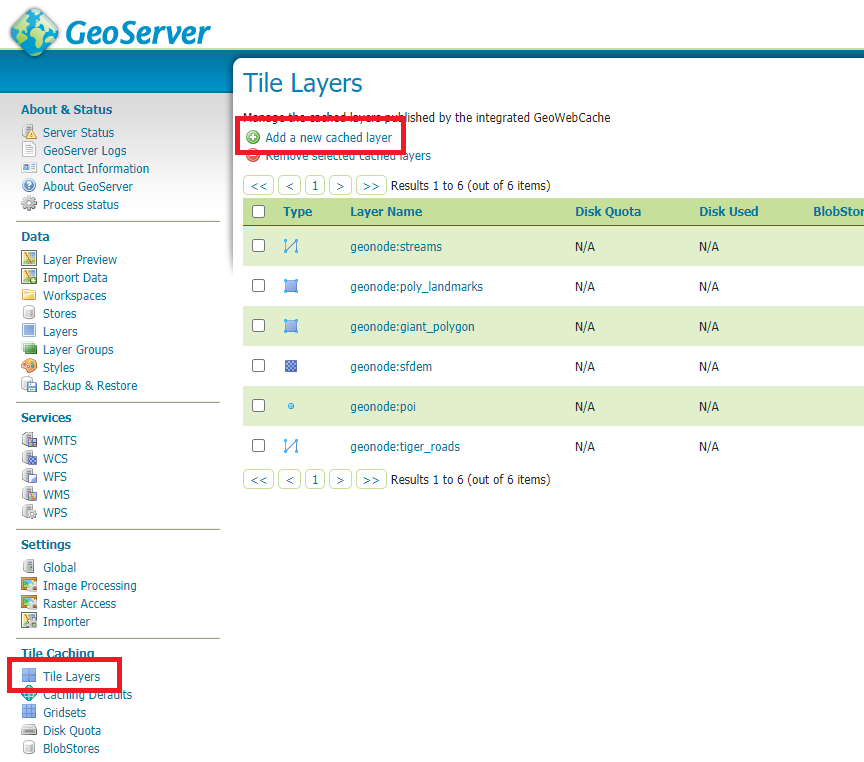
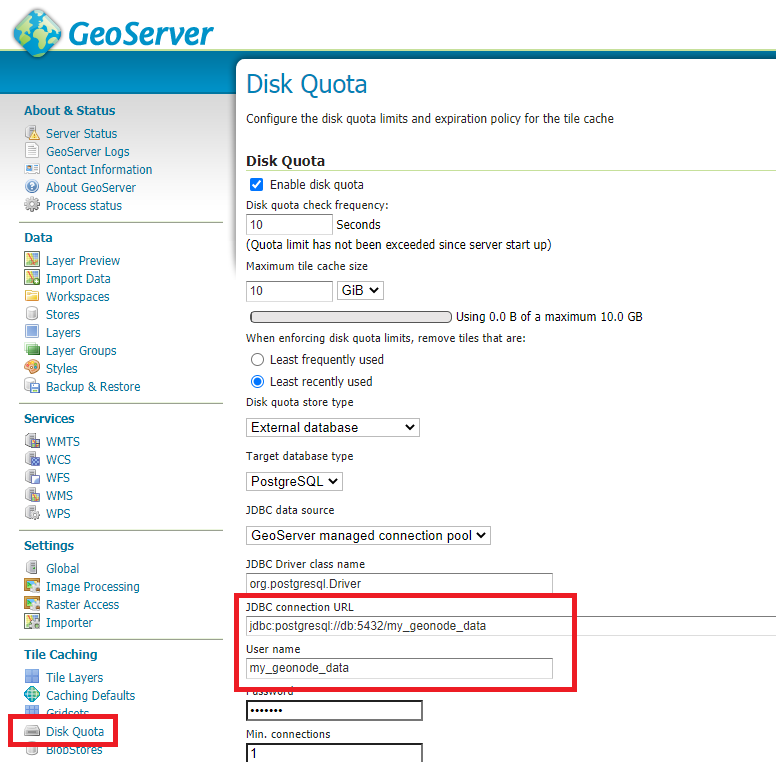
By default GeoWebCache DiskQuota is disabled. That means that the layers cache might potentially grow indefinitely.

GeoWebCache DiskQuota should be always enabled on a production system. In this case, it is enabled, this must be configured to make use of a DB engine like Postgis to store its indexes.

  • First of all ensure Tile Caching is enabled on all available layers

Note

GeoNode typically automatically does this for you. It is worth it to double-check anyway.

../../_images/production_geoserver_008.png

Tile Caching: Tiled Datasets

  • Configure Disk Quota by providing the connection string to the DB Docker Container as specified in the .env file

../../_images/production_geoserver_009.png

Tile Caching: Disk Quota Configuration

GeoFence Security Rules On Postgis

By default GeoFence stores the security rules on an H2 db.

On a production system, this is not really recommended. You will need to update the GeoServer Docker container in order to enable GeoFence to store the rules in the DB Docker Container instead.

To do that, follow the procedure below:

# Enter the GeoServer Docker Container
docker-compose exec geoserver bash

# Install a suitable editor
apt update
apt install nano

# Edit the GeoFence DataStore .properties file
nano /geoserver_data/data/geofence/geofence-datasource-ovr.properties

Note

Make sure to provide the same connection parameters specified in the .env file

geofenceVendorAdapter.databasePlatform=org.hibernatespatial.postgis.PostgisDialect
geofenceDataSource.driverClassName=org.postgresql.Driver
geofenceDataSource.url=jdbc:postgresql://db:5432/my_geonode_data
geofenceDataSource.username=my_geonode_data
geofenceDataSource.password=********
geofenceEntityManagerFactory.jpaPropertyMap[hibernate.default_schema]=public
# Update the GeoServer WEB-INF/lib JARs accordingly
wget --no-check-certificate https://repo1.maven.org/maven2/org/postgis/postgis-jdbc/1.3.3/postgis-jdbc-1.3.3.jar -O postgis-jdbc-1.3.3.jar && \
wget --no-check-certificate https://maven.geo-solutions.it/org/hibernatespatial/hibernate-spatial-postgis/1.1.3.2/hibernate-spatial-postgis-1.1.3.2.jar -O hibernate-spatial-postgis-1.1.3.2.jar && \
rm /usr/local/tomcat/webapps/geoserver/WEB-INF/lib/hibernate-spatial-h2-geodb-1.1.3.1.jar && \
mv hibernate-spatial-postgis-1.1.3.2.jar /usr/local/tomcat/webapps/geoserver/WEB-INF/lib/ && \
mv postgis-jdbc-1.3.3.jar /usr/local/tomcat/webapps/geoserver/WEB-INF/lib/

The container is now ready to be restarted.

Warning

Remember to do a soft restart otherwise the WEB-INF/lib JARs will be reset to the original state

# Exit the GeoServer container
exit

# Soft Restart GeoServer Docker Container
docker-compose restart geoserver

IMPORTANT: The first time you perform this procedure GeoFence won’t be able to retrieve the old security rules anymore.

You will need to Fixup GeoNode Datasets Permissions to regenerate the security rules.

Fixup GeoNode Datasets Permissions

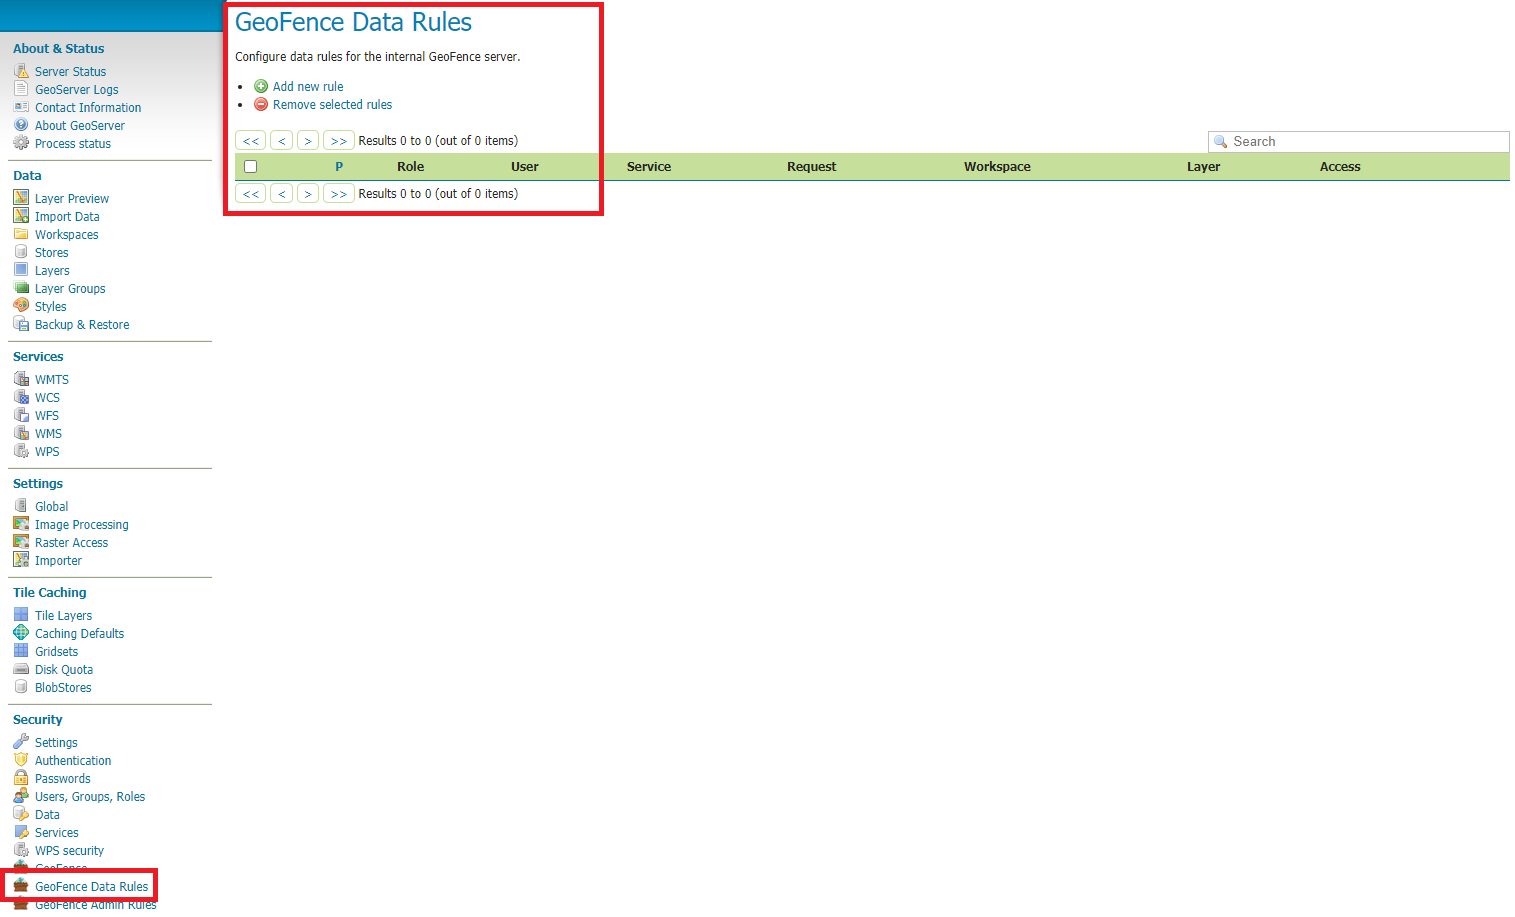
The list of the GeoFence Security Rules is available in the GeoFence Data Rules section.

Always double-check that the list is accessible and the data rules are there. If it is empty, no layer will be accessible by standard users other than admin.

../../_images/production_geoserver_010.png

GeoFence Data Rules

To re-sync the GeoFence security rules, follow the procedure below:

# Enter the GeoNode Docker Container
docker-compose exec django bash

# Run the `sync_geonode_datasets` management command
./manage.sh sync_geonode_datasets --updatepermissions

Regenerate GeoNode Datasets Thumbnails

The following procedure allows you to batch regenerate all Datasets Thumbnails:

# Enter the GeoNode Docker Container
docker-compose exec django bash

# Run the `sync_geonode_datasets` management command
./manage.sh sync_geonode_datasets --updatethumbnails

Regenerate GeoNode Datasets BBOXES

The following procedure allows you to batch regenerate all Datasets BBOXES:

# Enter the GeoNode Docker Container
docker-compose exec django bash

# Run the `sync_geonode_datasets` management command
./manage.sh sync_geonode_datasets --updatebbox

Migrate GeoNode To A New Hostname

In this case, you will need to move your instance to another domain, for example from https://my_geonode.geonode.org/ to https://prod_geonode.geonode.org/, follow the procedure below:

  • Update the .env file by specifying the new name accordingly.

  • Restart the GeoNode Docker Container.

    docker-compose up -d geonode
    
  • Run the following management commands from inside the GeoNode Docker Container.

    # Enter the GeoNode Docker Container
    docker-compose exec django bash
    
    # Run the `migrate_baseurl` management command
    ./manage.sh migrate_baseurl --source-address=my_geonode.geonode.org --target-address=prod_geonode.geonode.org
    
    # Run the `set_all_layers_metadata` management command
    ./manage.sh set_all_layers_metadata -d
    

Add Huge Or DB Datasets To Your Instance

Uploading huge datasets, or DB tables, to GeoNode from the Web Upload Interface is sometimes not really possible.

The suggested procedure, in such cases, is the following one:

  • Add the dataset to GeoServer first directly.

    You must upload the data into the GeoServer Docker Container Static Volume first and then manually add the layer through the GeoServer Admin GUI.

  • Once the dataset is correctly configured on GeoServer, run the following management command from inside the GeoNode Docker Container

    # Enter the GeoNode Docker Container
    docker-compose exec django bash
    
    # Run the `updatelayers` management command
    ./manage.sh updatelayers -w <workspace_name> -f <layer_name>
    

Update GeoNode Core To The Latest Commit

In this case, you will need to update the GeoNode Core codebase to a specific version or commit. Please follow the steps below:

# Enter the GeoNode Docker Container
docker-compose exec django bash

# Update GeoNode
cd /usr/src/geonode/
git fetch --all --prune
git checkout <commit or branch>

# Update the pip dependencies
pip install -r requirements.txt --upgrade --no-cache
pip install -e . --upgrade

# Synchronize the GeoNode Project
cd /usr/src/my_geonode/
./manage.sh makemigrations
./manage.sh migrate
./manage.sh collectstatic

# Refresh UWSGI Daemons
touch /usr/src/my_geonode/my_geonode/wsgi.py

# Follow the logs and make sure non-errors occur
tail -F -n 30 /var/log/geonode.log