Improving Contents Metadata
Correctly setting the dataset’s metadata is very important in GeoNode. The metadata allows the owners to describe the datasets’ contents and quality better. Further, the metadata allows the owner to set restrictions or license constraints on its usage while still allowing registered GeoNode members to search for it on the catalog.
Adding a Shapefile
**Note**
You can skip to the `Editing Metadata` section directly in the case
you already added this dataset in the previous training sessions.
Navigate to the GeoNode main page
http://localhostand log in asadmin. On the resources page, click theAdd Resourcebutton and then click theUpload datasetlink from the dropdown menu.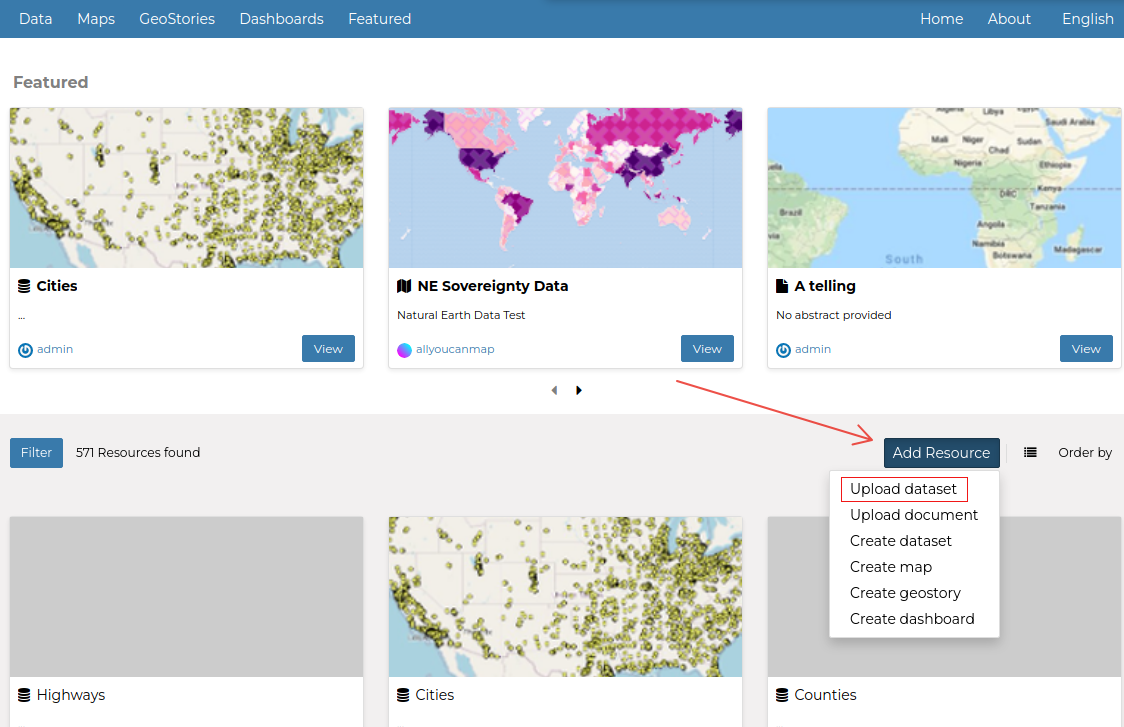
On the next page, click on
Select Files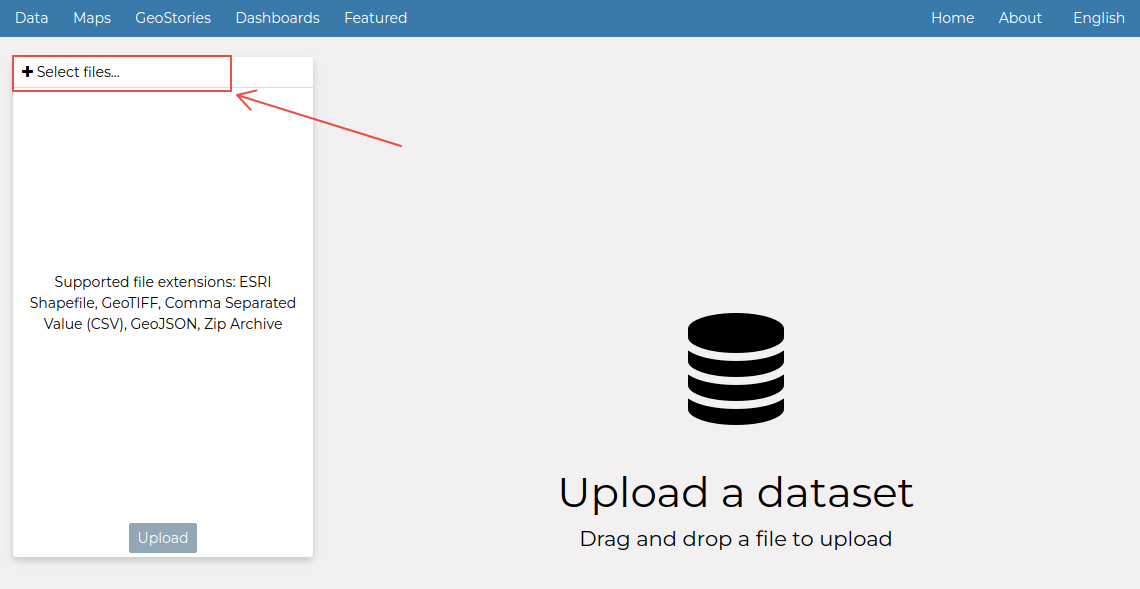
From the
file browser windownavigate to:1:
/opt/data/sample_data/pretty_maps/data/boulder(i.e. the folder where the data is stored)2: Select all the
Mainrd.*files by pressingRIGHT-SHIFTandLEFT-CLICK3: Click on the
Openbutton
If everything went well, you should be able to see the file name and file extension listed on the
Upload datasetpage; click on theUploadbutton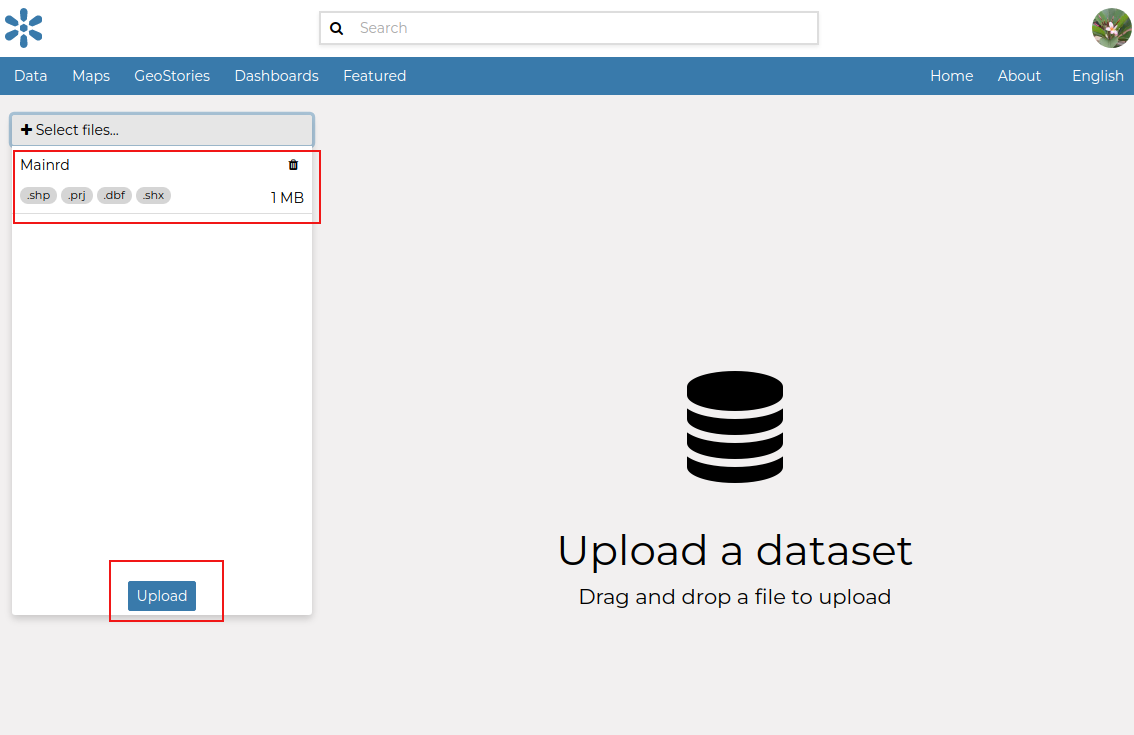
The upload will start and you will be able to see a progress bar on the top of the page. Please be patient, if you have a slow machine it will require some time to finish.
If no errors occur, the progress bar will reach
100%and the name of the newDatasetwill become clickable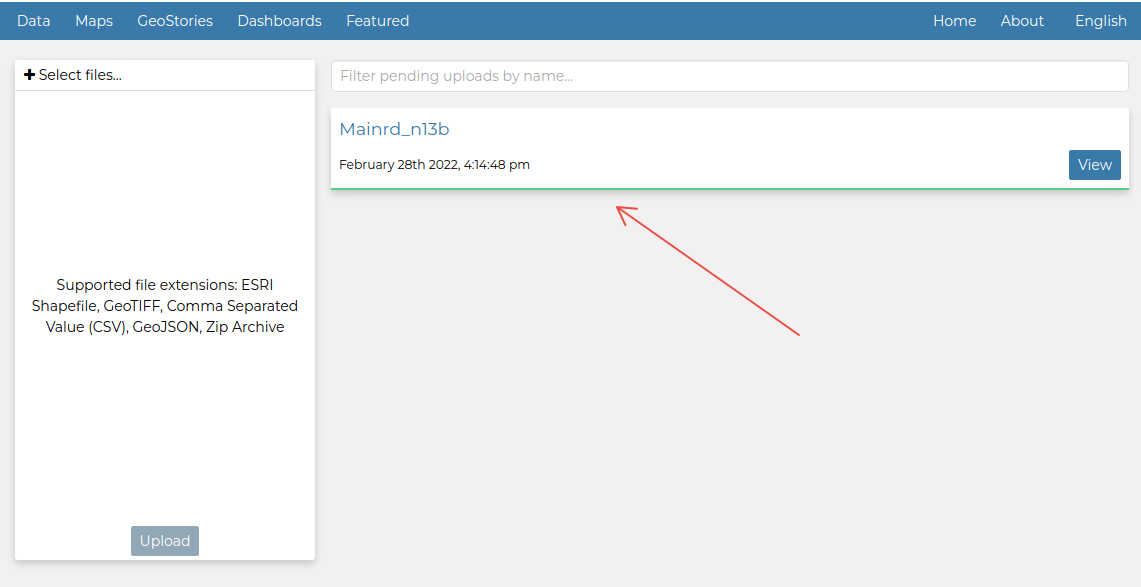
Click on the
datasetname or on theviewbutton in order to be redirected to theDetails Page.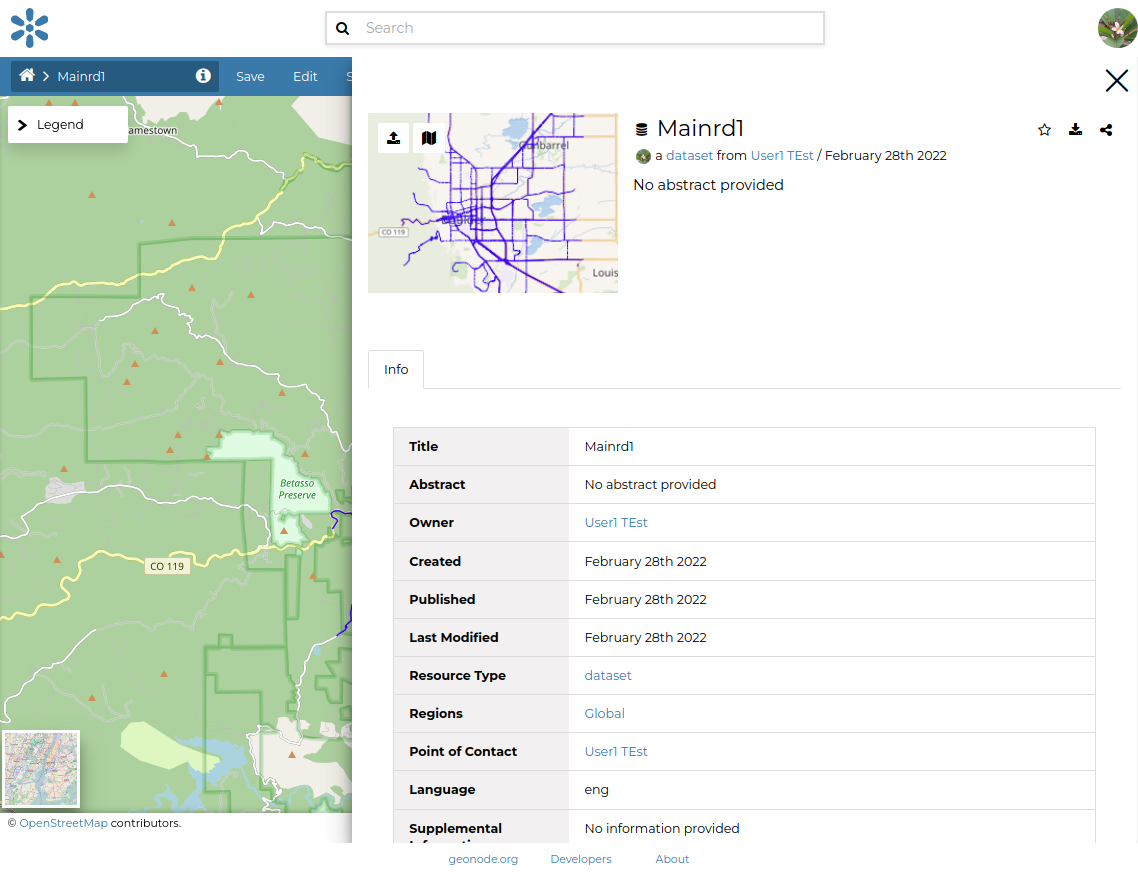
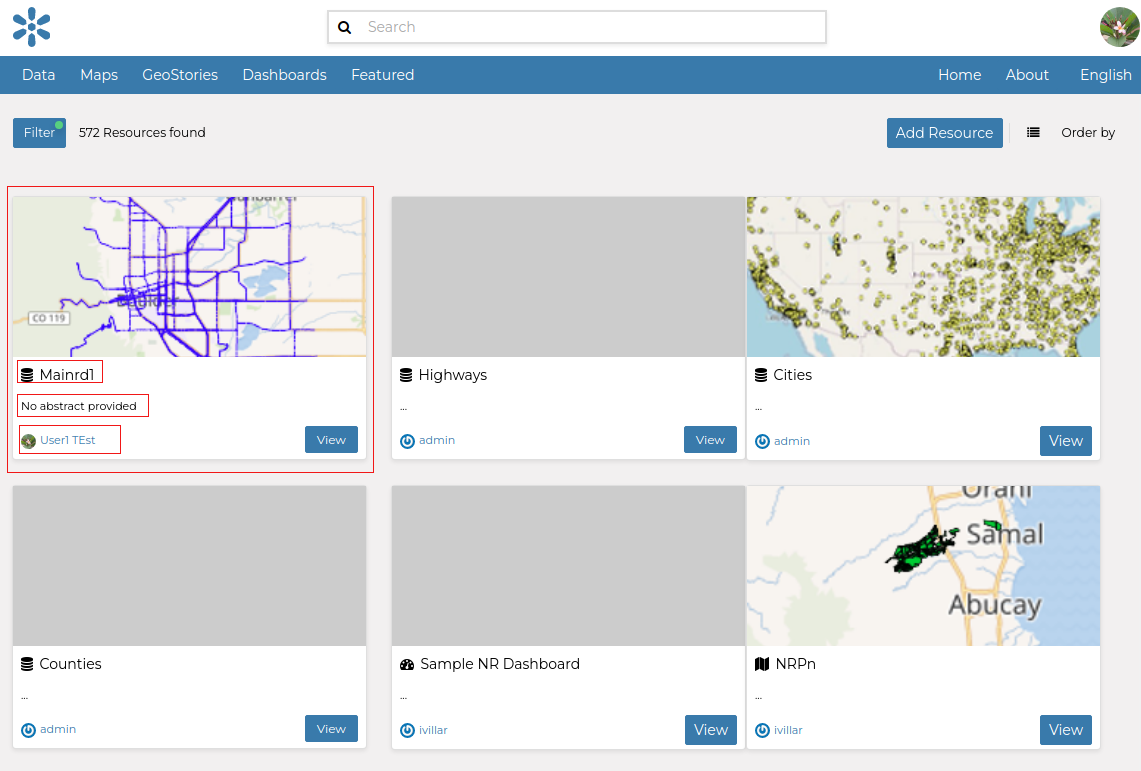
Click on the
Datasetslink of theDatadropdown menu to go back to the list of all the available datasets. The newly uploaded dataset will be listed and a small summary card will report the most important information about the dataset:The thumbnail depicts a quick preview of the dataset
The small section shows the clickable name of the dataset along with an abstract, which is empty by default
There’s also the name of the owner/creator of the content and the publication date
Adding a GeoTiff
**Note**
You can skip to the `Editing Metadata` section directly in the case
you already added this dataset in the previous training sessions.
Repeat the first two steps we have done for the
Shapefileupload but now for a GeoTiff. Then click theSelect Filesbutton and navigate to thetest_grid.tiffrom the file path/opt/data/sample_data/gisdata/data/good/raster/test_grid.tif. Select the file and clickOpen.Upload the file and wait for the progress bar to finish
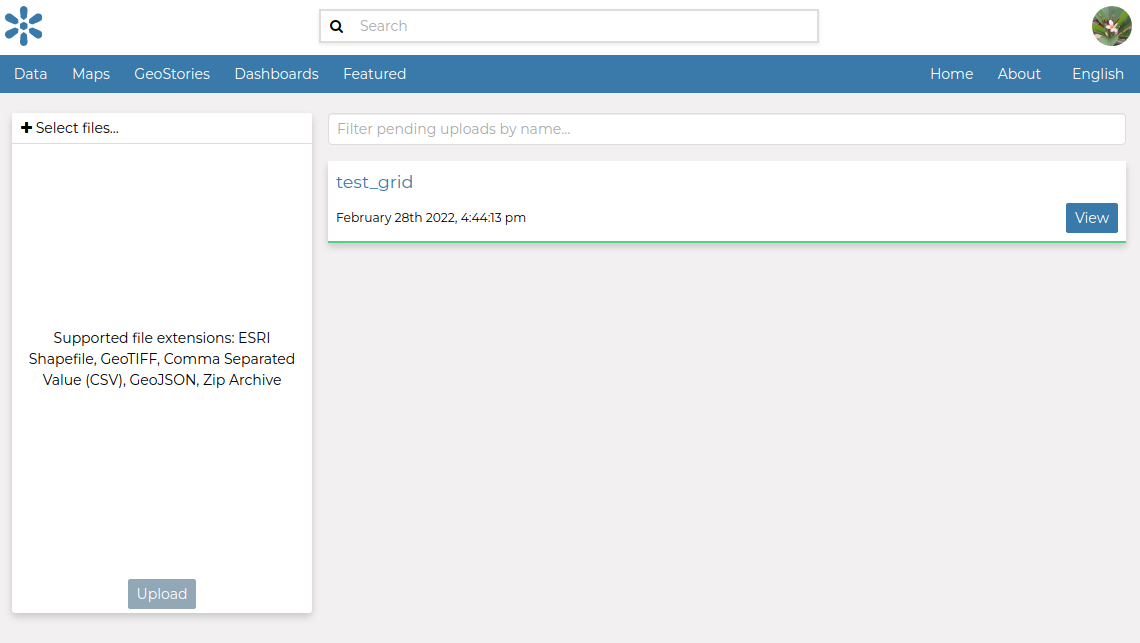
Navigate to the datasets list and select the newly created dataset

Editing Metadata
As an
admin, or as a user withmanageshare permissions on the dataset, move to theMainrddataset detailsClick on
Edit > Edit Metadata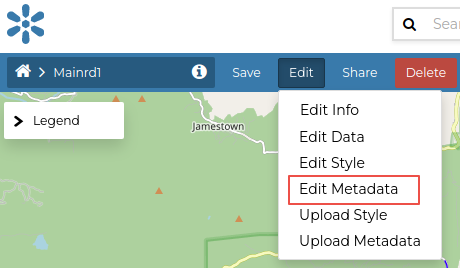
On the next form, fill the metadata fields as follows
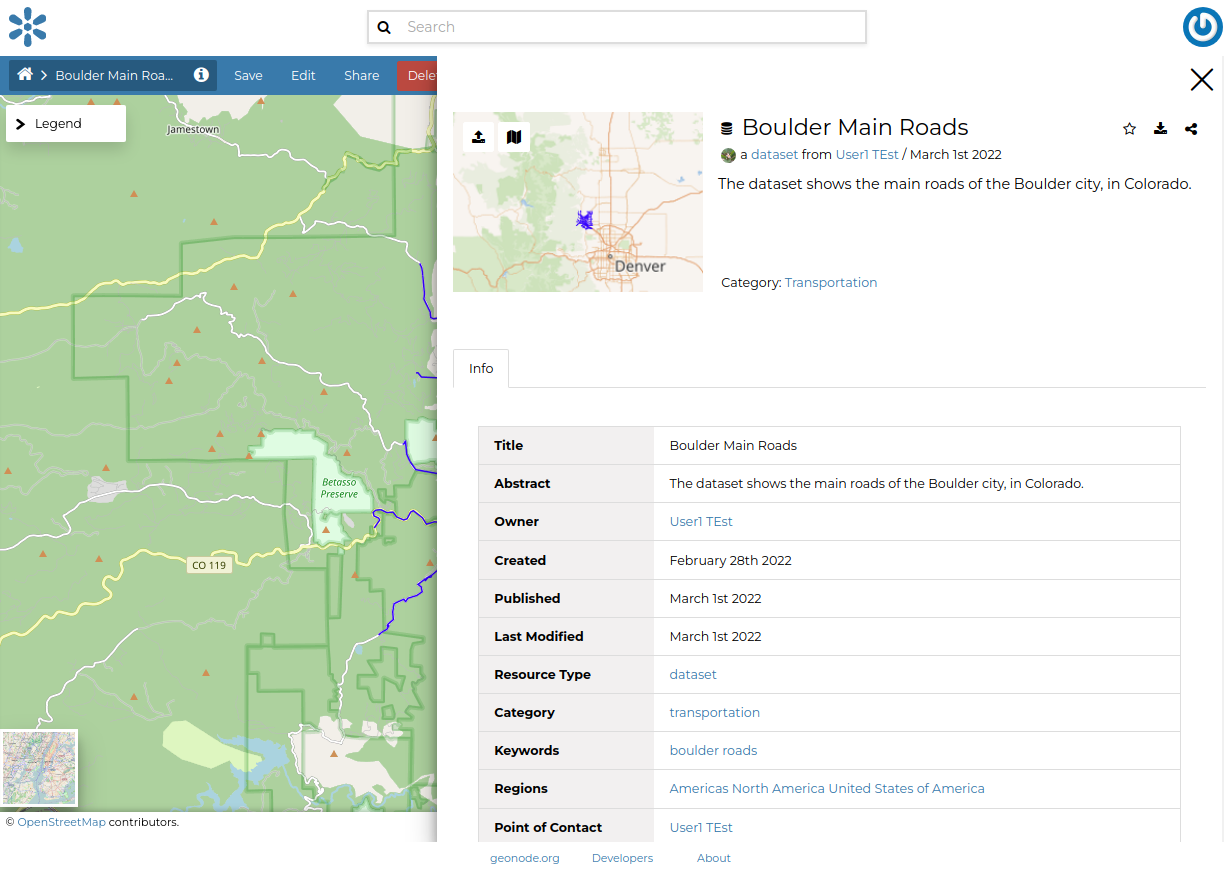
Title:
Boulder Main RoadsAbstract:
The dataset shows the main roads of the Boulder city, in Colorado.Publication Date: Update the date to
nowCategory:
TransportationFree-text Keywords:
boulder, roads,License:
Open Data Commons Open Database License / OSMRegions:
United Stated of America [North America], Americas, North America,Temporal Extent:
2021-08-01 to 2021-09-30
From the
Optional Metadataform, click on thetoggle more Contact Roleslink and fill some of the additionalContact Rolesat your convenence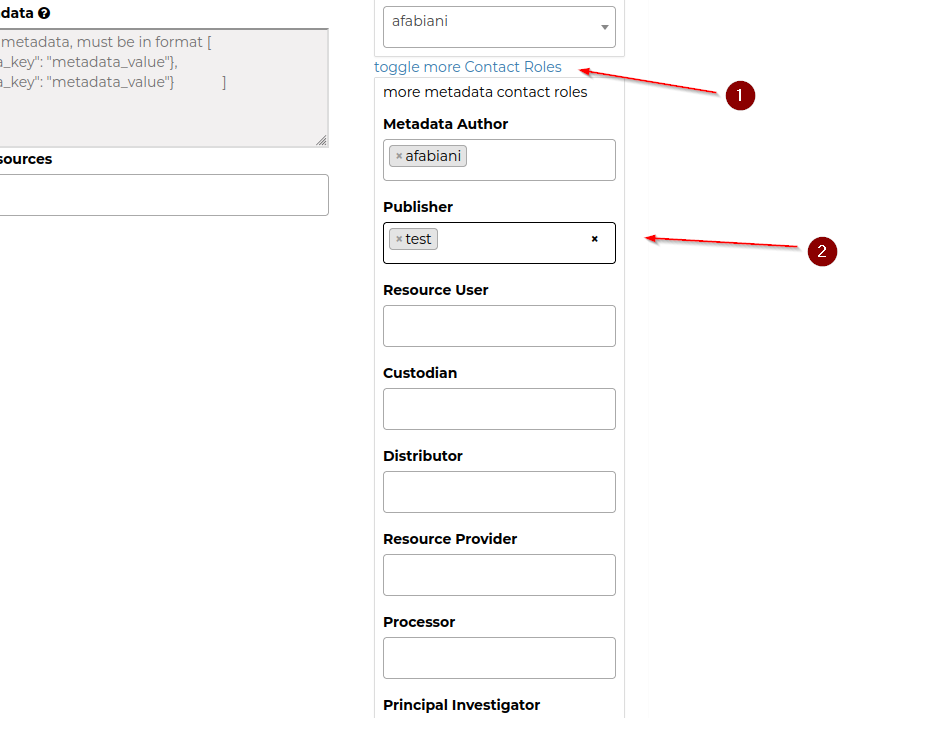
Click on
Updateand wait for the page to be reloaded; theinfopanel will show the updated information.