Configuring Authentication
The GeoNode plugin can authenticate remote GeoNode instances by using HTTP Basic Auth (OAuth2 is also an option, if
necessary). It is important to configure Authentication with your platform credentials if you wish to use the QGIS GeoNode Plugin to upload styles and data to your GeoNode instance.
You can configure the Authentication either during the creation of a new connection or by editing an existing connection.
In order to configure Basic Auth for the Test Connection 1:
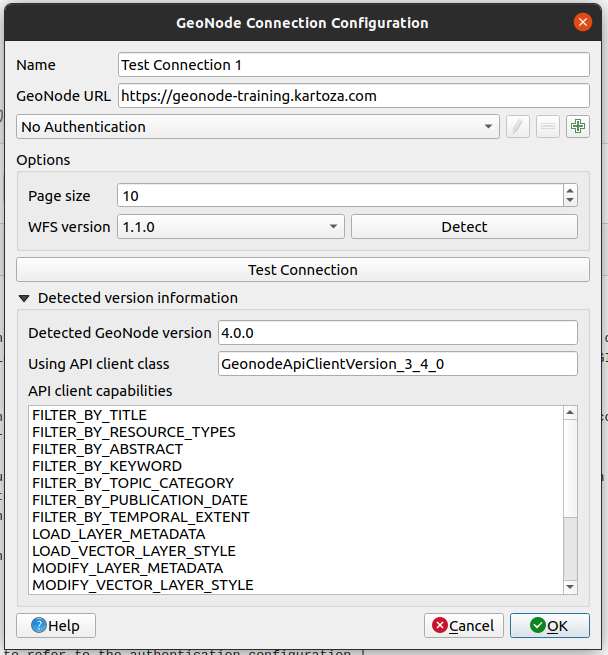
In the GeoNode tab of the Data Source Manager make sure that Test Connection 1 is selected from the connection dropdown
Click on the edit button to open the GeoNode connection configuration dialogue
In the dialogue click on the green plus next to the No Authentication field to open the Authentication dialogue
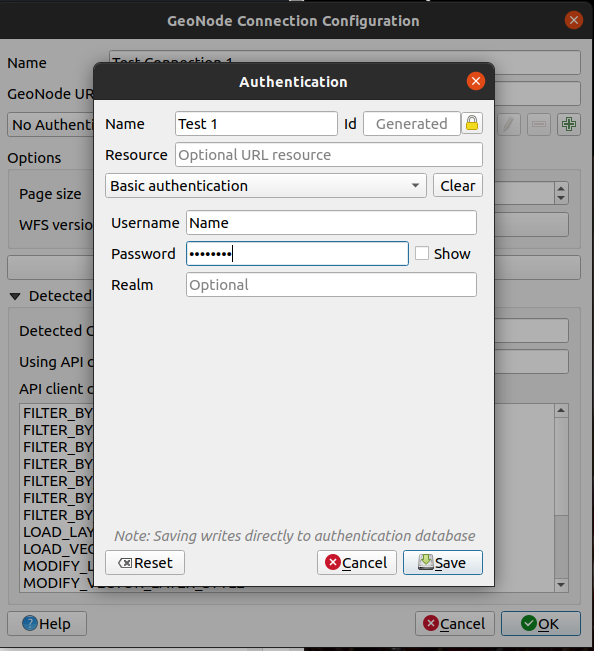
Enter the Name Test 1 in the Name field
Select Basic Authentication
Input your user credentials that allow you access to the GeoNode instance
Using OAuth2 for authorization
This option is not recommended in most cases, since it involves a more advanced setup and also requires requesting additional information from the remote GeoNode administrators. It may be viable when connecting to GeoNode using shared computing resources, where you do not want to store your GeoNode user credentials locally.
To be able to gain authenticated access to a GeoNode connection via OAuth2 you will need to request that one of the GeoNode administrators create an OAuth2 application and provide you with the following relevant details:
Most OAuth2 grant types implemented in QGIS are supported. We recommend using the Authorization Code grant type. To configure such an authentication:
Open the main QGIS authentication settings dialogue by going to
Settings -> Options... in the main QGIS menu bar and then access the
Authentication section
Press the Add new authentication configuration button. A new dialogue is
shown. In this dialogue, fill in the following details:
Parameter |
Description |
|---|
Name |
The name used by QGIS to refer to the authentication configuration |
Authentication type |
Select the OAuth2 authentication option from the dropdown |
Request URL |
This is derived from the GeoNode base URL and takes the form <geonode-base-url>/o/authorize/, e.g. https://stable.demo.geonode.org/o/authorize/ |
Token URL |
This is derived from the GeoNode base URL and takes the form <geonode-base-url>/o/token/, e.g. https://stable.demo.geonode.org/o/token/ |
Client ID |
The client ID you got from your GeoNode administrator |
Client Secret |
The client secret you got from your GeoNode administrator |
The remaining fields can be left at their default values
Now when configuring a new GeoNode connection select this newly created authentication configuration in order to have the
GeoNode connection use it.